

Industry Figure | Berkeley | Back to Jeep Cherokee
Main | Rear Lift | Front Lift | Quick Disconnects | Side Effects | AAL & Blocks | Bent Leafs
Cherokee 3.5" Lift Installation - Rear Lift
Starting the lift at the rear made sense to me. I was sagging in the rear, probably because the original leaf springs were shot, and replacing the leaf springs, shackles and shocks seemed like a great way to get warmed up for the front coil springs.
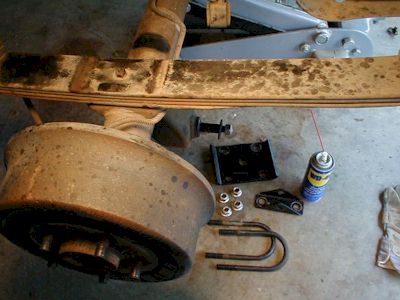
This kit, dubbed the "Charlie XJ" by the (now defunct) Cherokee Connection, is a combination of selected parts from Old Man Emu (OME) and TeraFlex (with new original equipment rear leaf spring bushings). Though the OME parts come with no documentation, TeraFlex includes written instructions for both the rear shackles and the front coil spring spacers. Since the instructions relate only to the shackle replacement, I'll be excerpting them in italic as they relate to the entire lift project. (They are listed in their entirety here.) My comments and links to images are inserted throughout.
XJ guru Bart Jacobs advises that on older Cherokees, when you're replacing the entire rear spring pack, it's advisable to hit the shackle bolts and the front eye bolt with penetrating oil at least 24 hours ahead of starting the project. These can be extremely difficult to remove. Also, the bolt will sometimes rust to the inner sleeve of the bushing making it necessary to cut the spring eye, bushing, and sleeve off (a real pain). I have a clean vehicle, used WD-40 about an hour before, and had no trouble with any of the bolts.
Getting Started
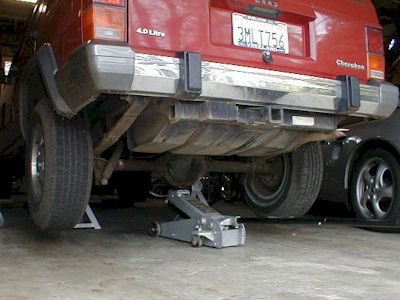
Place vehicle on a clean level working area. Set emergency brake and block tires on opposite side of vehicle that you will be installing spring shackle lift. Be sure that vehicle will not roll.
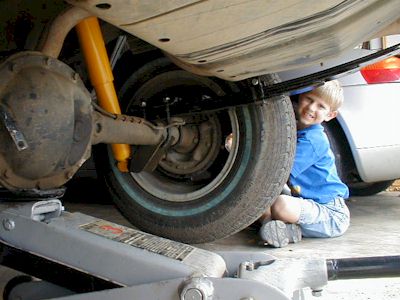
You are lifting the entire rear of the car, so be sure to block both front wheels. The parking brake works for the rear only, so as soon as the rear is lifted, the front wheels are free to roll. To further prevent the possibility of vehicle movement, put the Cherokee into four-wheel drive (part-time 4WD for the NP242, or Select-Trac) and leave the transmission in gear (for a manual) or in park (for an automatic). Using a floor jack, lift one end of vehicle until wheels clear ground by at least 3 inch. Place jack stands under frame rail just behind inner spring perch. Lower vehicle onto jack stands, but keep the axle supported with the floor jack.I worked on both sides simultaneously (I spelled that without using the spell-checker). When I say, for example, to remove the shock absorber, remove them both.
Remove the wheels (3/4" socket). Lower the axle until the pressure is off the springs, but don't remove the jack completely. Ideally, the jack is now supporting only the weight of the axle and the springs are completely relaxed. With all the nuts and bolts on this project, it's a good idea to spray or soak them with a lubricant before attempting to undo them. WD-40 worked for me; I had no trouble with any fasteners.
Disassembly
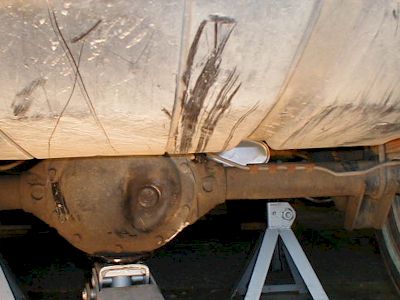
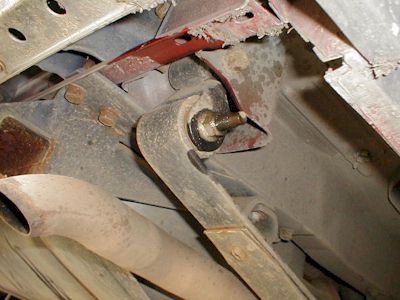
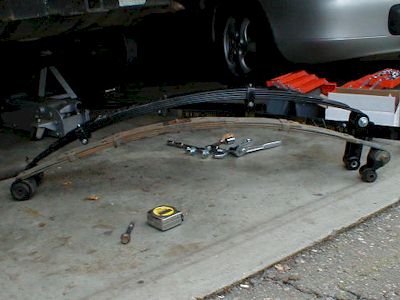
Disconnect the shock absorber at the axle (18mm socket). The axle is held to the springs with four u-bolts. Unbolt and remove the u-bolts (18mm socket) and lower the axle until it's well clear of the old springs. Once the old spring is removed, you will need enough extra room to install the new, taller spring and shackle.
Remove the top shackle bolt (13/16" socket... it's probably a 21mm socket, but my set jumps from 18mm to 22mm which is too loose). If there's still pressure on the springs, you'll have trouble getting the bolt out. The rubber bushing will prevent the shackle from rotating freely on the spring, so you might need to pry the shackle toward the rear to un-jam the bolt enough for you to slide it out by hand. Disconnect the front spring bolt (13/16" socket). This bolt took some muscle. More accurately, it took a big wrench and a sledge hammer. The factory anti-slip goo really works. Since we're replacing both the spring and shackle, there's no need to unbolt them. Set the spring aside.
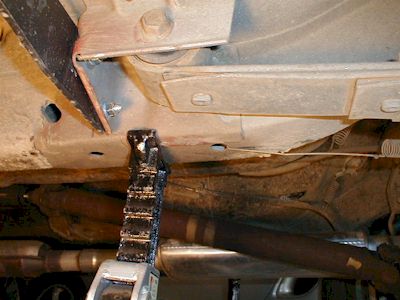
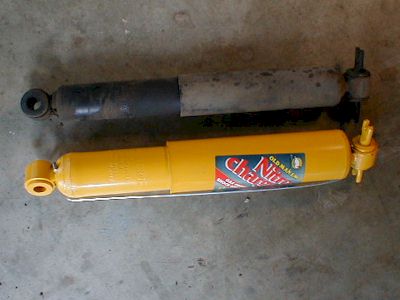
Be careful now. After lubricating the if-you-break-them-you're-screwed bolts, remove the old shocks (13mm socket). The passenger-side shock is blocked by the exhaust pipe, but still easy to remove.
Assembling the new parts
Install the new yellow shocks at the top only. Make sure the Old Man Emu label is pointing out so that people can see what good taste you have. (My wife calls me "Nitro Charger" now. She's the best!)
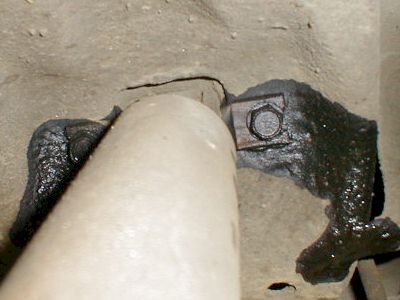
Examine [both the front and rear spring perches] on both sides of vehicle for any damage. If any damage is noted, it must be repaired to "new" factory original condition.
The kit comes with all new rear leaf spring bushings (original factory parts) and the bushings are pre-installed from the Cherokee Connection. This is a super feature of the Cherokee Connection kit, because without the proper tools the bushings are a pain to insert.
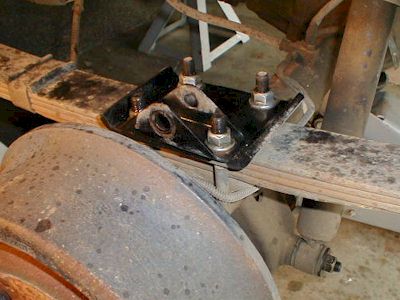
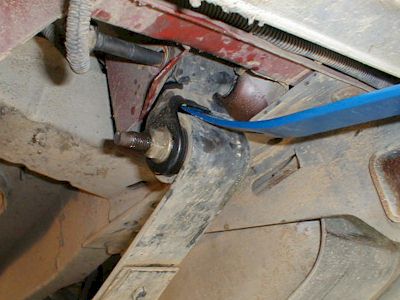
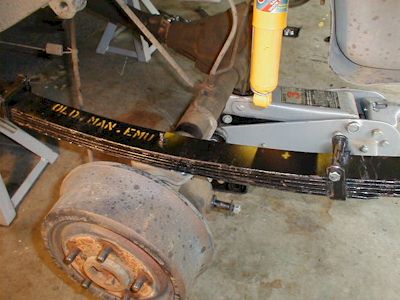
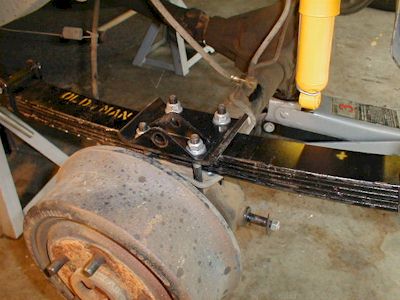
Attach the new shackle to the new spring. Do not use power impact or air ratchet to tighten nuts, they are nylon insert locknuts (aircraft style) and need only be tightened with a wrench by hand. To make installation easier, I measured from perch to perch and matched that distance--spring eye to upper shackle bolt hole--when I tightened the shackle to the spring. If you want, now's the time to compare the new and old springs. The shackles add a bunch of height, but so do the springs. They're stiffer, have an extra leaf, and each leaf is way longer. Install the new springs. Tighten the bolts to proper factory specifications. Be careful to not over-tighten bolts; damage to shackle or vehicle can result.
Raise the axle until it hits the new springs. You need to move/wiggle/rotate the axle so that the pins on the underside of the springs line up with the positioning holes in the flat axle/spring mount. With just the right amount of pressure under the axle, the pins should pop into place without too much muscle. Once the springs and axle are positioned correctly, raise the axle a little more to be sure nothing will move.
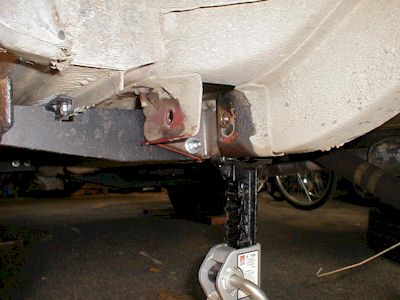
Reconnect the u-bolts and the spring plate. I left the anti-sway bar link brackets in place. The OME u-bolts were on backorder when I received my kit. You can see in the before image that there was more than enough room left on the bolt to allow for the thicker (by one leaf, or 1/4") springs, so I reused my originals. I've heard that the u-bolts are easily broken during disassembly, but I had no trouble.
Connect the shocks at the axle.
Check your factory repair manual for proper torque specifications. Be sure the torque specification are for the proper year, make, model of your vehicle. Tighten to proper factory specifications. Be careful to not over-tighten bolts; damage to shackle or vehicle can result.
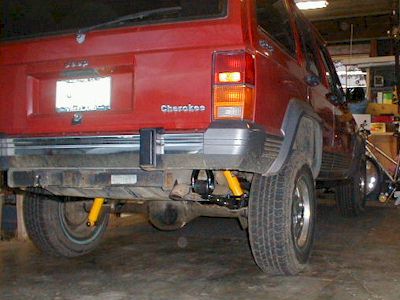
Now you've got a funky-looking Jeep. Drive around with your tail in the air and marvel at the huge difference the extra stiffness (and four inches) makes. Next, we'll lift the front.
Main | Rear Lift | Front Lift | Quick Disconnects | Side Effects | AAL & Blocks | Bent Leafs