
Industry Figure | Berkeley | Back to Jeep Cherokee
Main | Rear Lift | Front Lift | Quick Disconnects | Side Effects | AAL & Blocks | Bent Leafs
Cherokee 3.5" Lift Installation - Lift Side Effects
Of course, something always goes wrong. My lift kit installation generated a few negative side effects. I'll tell you what went wrong and how I fixed it.
Offset Front Axle
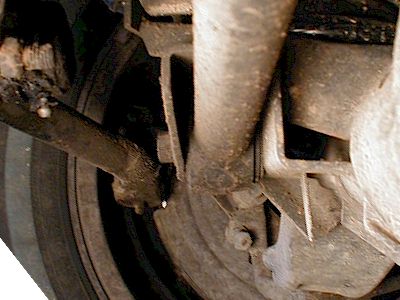
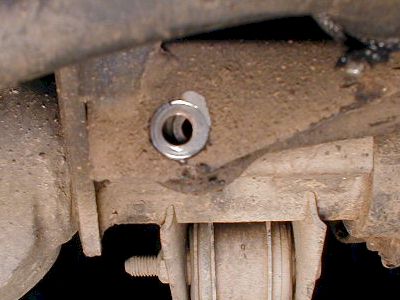
Lifting the Cherokee causes the front axle to shift to the driver's side. It does this because of the nature of the coil-spring suspension. Unlike a leaf spring suspension, which inherently stabilizes the (in our case rear) axle, the front coils have no such characteristics. The axle is prevented from moving forward/backward by the upper and lower control arms. The trackbar (also known as a Panhard rod) prevents the axle from shifting from side to side. The car body, the trackbar, and the axle form a kind of "Z" with the trackbar as the diagonal. As the distance between the body and the axle increases, the body and axle start to shift. To combat the offset axle there are three choices: redrill the hole for the existing trackbar (effectively making it longer), purchase an adjustable bar, or do nothing.
By eye, my axle was clearly offset, but by measurement it was only off by about 3/8" which isn't much. Measurement isn't the best method, though. There are lots of inconsistencies possible in the construction of the Jeep, so measuring from the outside of the wheel to the wheel flare (which is what I did) won't necessarily be accurate. To find suspension neutral, I was advised to disconnect the trackbar at the axle, settle the vehicle (by bouncing it around, up and down, back and forth), then seeing where the trackbar naturally wants to reattach to the bracket. On average, there should be plenty of room for the new hole to be drilled.
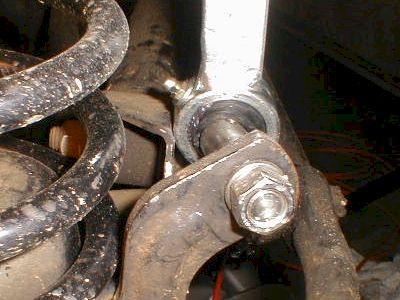
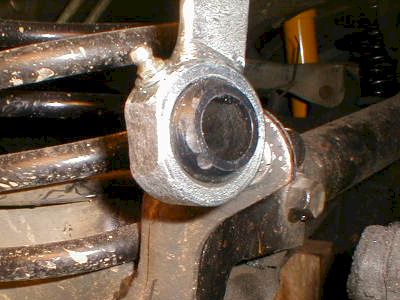
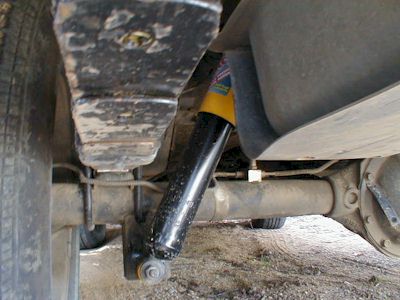
While we're talking about disconnecting the bar, take a look at the really cool nut-holder-bracket. In the first and second images, you can see the holder-tab hanging down behind the bar.
I did all this and was surprised to see that the hole wasn't offset by enough to drill another hole. I could buy an adjustable bar, but the hole is so close, I don't think it would make that much difference. I reattached the bar in its original location.
Driveline Vibration
 After the initial lift
kit was installed, I went for a short drive. As soon as I reached about 45 mph, the
vibration started. Bummer. What's the problem?
After the initial lift
kit was installed, I went for a short drive. As soon as I reached about 45 mph, the
vibration started. Bummer. What's the problem?
It is well known that a single universal joint introduces a severe imbalance into the driveline. The u-joint construction is such that the "X" portion of the joint is speeding up and slowing down while rotating. And the greater the driveline angle, the greater the problem. Fortunately, there's always a second u-joint to completely offset that imbalance... if the input and output shafts are perfectly parallel. Well, nothing is ever perfect, especially if you've just added longer rear shackles to your XJ.
The transfer case rear output and the rear differential input shafts should be parallel. Lifting the car won't necessarily change the angle, but adding rear shackles definitely will. Envision: the rear diff is parallel to the transfer case... now drop the rear leaf... you've just rotated the diff up toward the transfer case and thrown the two shafts out of alignment. Vibration and certain doom to your expensive driveline are guaranteed if not fixed.
The fix is simple and inexpensive. Add shims between the leaf springs and the axle to re-rotate the axle back into alignment with the transfer case.
Chet at the Cherokee Connection, with years of experience under his belt, suggested starting with a 3 degree shim. It might take 2, or 4, or 5 degrees, or the shims alone might not get rid of the vibration, but they will certainly help. I calculated that the longer shackles added 3" of lift to the system and that the springs are about 50" long. Everyone knows that the inverse tangent of 3 divided by 50 is about 3.4 (degrees), so I started with--as Chet had already suggested--a 3 degree shim. Bingo.
As I said, I hadn't even noticed the vibration until about 45 mph. After the shims were in place I could tell within the first 50 feet of driving... totally smooth. I could not detect a vibration even beyond freeway speeds. Problem solved.
 Tailpipe
Interference
Tailpipe
Interference
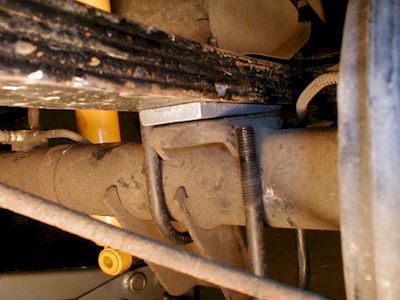
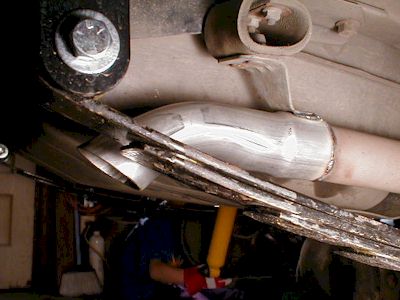
The longer shackle interferred with the exhause pipe. In fact to install the shackle in the first place I had to clamp the pipe against the tow hitch. To discuss possible solutions, I stopped at the local muffler shop.
Dale and I decided there wasn't enough room to simply bend the pipe, centering it between the shackle and the tow bar. It was too likely to rattle.
After some more discussion (mostly revolving around the lift kit and especially about the Custom 4x4 Fabrication components) we decided to shorten the exhaust by cutting off the old pipe and adding a new tip. The new tip hangs down a bit, but so far, so good. Problem solved.
Quick Disconnect Interference
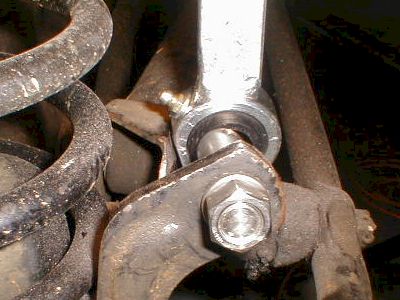
The passenger side quick disconnect was impossible to connect. There wasn't enough room between the stud bracket and the steering stabilizer bracket to connect the disco arm. You can see in the first image that the disco isn't even close to going onto the stud, but it is already hitting the steering stabilizer bracket. To increase clearance, I decided to grind down both the bracket and the disconnect joint so that neither would be affected by too severe a loss of material.
Quick Disconnect Loose
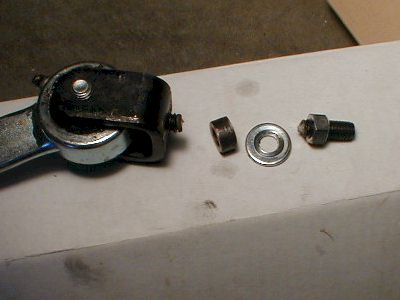 I broke the bolt which
connects the disconnect arm to the anti-sway bar. In the image, from left to right, you
can see the disconnect arm with the black u-bracket and broken stud, the too-fat bushing,
the washer, and the nut/broken stud combo. The disco attaches through a hole in the
anti-sway bar, but it would never tighten. The nut seemed tight, but the assembly rotated
freely on the end of the anti-sway bar.
I broke the bolt which
connects the disconnect arm to the anti-sway bar. In the image, from left to right, you
can see the disconnect arm with the black u-bracket and broken stud, the too-fat bushing,
the washer, and the nut/broken stud combo. The disco attaches through a hole in the
anti-sway bar, but it would never tighten. The nut seemed tight, but the assembly rotated
freely on the end of the anti-sway bar.
Foolishly, I chose my new torque wrench (22" lever arm instead of the normal 10-12" wrench length) to try to get the assembly tighter. The instant the bolt snapped, I knew what was wrong. The nut was tight, but the washer was too thick, so the black u-bracket and washer could not tighten around the thinner anti-sway bar.
After receiving a replacement piece (the stud is welded to the black u-bracket) and grinding the washer thinner, I was able to reassemble the disconnect arm tightly.
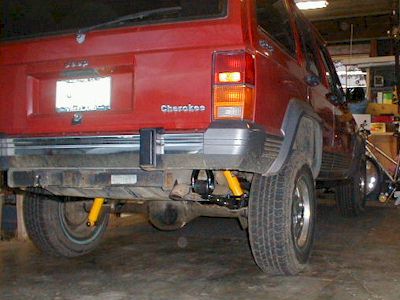
Funny-looking Yellow shock
The rear shock absorbers are mounted on opposite sides of the axle, the upshot of which--if you have bright yellow shocks--is that you've now got a visually lopsided rear. I couldn't help it... I sprayed the lower part of the shock black. Pity me.
Main | Rear Lift | Front Lift | Quick Disconnects | Side Effects | AAL & Blocks | Bent Leafs