
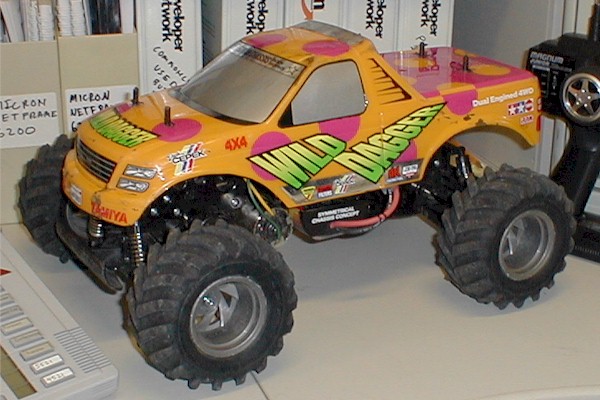
Berkeley's Tamiya Wild Dagger
Last updated: Tuesday, April 13, 2004 02:10 PM -0700
"As far as we know, these are the finest, wildest Wild Daggers
on the Central Coast... perhaps the world."
Peter Marx, Wild Dagger Team VERITAS
|
Team VERITAS: Jayme - Ch. 62 - 75.430 MHz Shaun - Ch. 68 - 75.550 MHz Mark - Ch. 69 - 75.570 MHz Dave - Ch. 72 - 75.630 MHz Mike - Ch. 78 - 75.750 MHz Berkeley - Ch. 86 - 75.910 MHz Peter - Ch. 88 - 75.950 MHz Dan - Ch. 90 - 75.990 MHz |
You'll need these items from Tower Hobbies.
| LXLT00 LXJC33 01169 |
1 1
|
Tamiya Wild
Dagger Tower Hobbies 400 AC/DC Auto Charger Promotional Discount (order of $300 or more) |
$129.99 $19.99 ($25.00) |
** At order time, pick a ground frequency.
You'll also need some paint.
| LL4427 LL4425 LL4428 LL44?? LL4383 LL4384 LXB339 LL4398 |
2 2 2 1 2 1 1 1 |
Pactra Polycarb 3oz. Bright Yellow (spray) Pactra Polycarb 3oz Metallic Black (spray) Pactra Polycarb 3oz. Brilliant Blue (spray) Pactra Polycarb 3oz. Fluorescent Red (spray) Kyosho Polyca Paint Fluorescent Pink 20cc (bottle) Kyosho Polyca Paint Fluorescent Orange 20cc (bottle) Coverite 4.75oz Spray Nevada Silver Metallic (spray) Pactra Polycarb 2/3oz. Metal Flake Silver (bottle) |
$2.99 $3.39 $3.39 $2.99 $2.99 $2.99 $3.59 $2.29 |
FAQ for R/C off-road electric racing - This article focuses on racing, but contains great info for any Wild Dagger driver, especially about motors, batteries (a little out-dated because of the new 2400 mAh Ni-Cd and 3000 mAh Ni-MH batteries), glue, etc.
Find our more about the Wild Dagger at the Tamiya (teh-ME-ya) web site.
Need more info? Here's the logic behind the order...
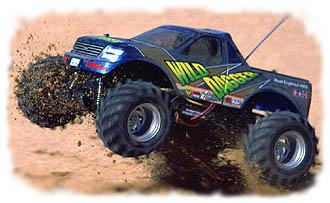
Tamiya Wild Dagger - This is the least expensive, best equipped two-motor, four-wheel-drive available. The Wild Dagger has many of the features of the more expensive models, without all the unnecessary extras. Even better, the cost is not much more that Skip's wimpy 2WD Stadium Thunder. (Skip has since humiliated us by buying the unbelievably fantastic--but, of course, more expensive--HPI RS4 MT 4WD.) See Skip's site for more information.
Sanyo 1500 Batteries - We chose to spend a little extra for the Sanyo name, but we're not racing in competition, so there's less need for the higher capacity batteries. If you're feeling wealthy, buy the more expensive 1700 or 2000 mAh batteries. If you're feeling exceptionally wealthy, buy the ~$70 (each) 3000 mAh Ni-HM which require a still different charger. In any case, you'll need at least two... then you can keep driving while the spare is charging.
Tower 400 Charger - This inexpensive charger automatically charges 1500 or 1700 mAh batteries for 30 minutes on "fast" then trickle charges until the battery is removed from the charger. If you opt for the bigger 2000 or 3000 mAh batteries, you'll need to order a different, compatible charger. (In retrospect, we probably should have bought "peak" chargers, which detect when the battery is full and automatically switch to trickle.)
Futaba Magnum Junior Radio (2PCKA) with Futaba MC210CB Electronic Speed Control with Reverse - We chose this radio package over the less-expensive options for two reasons. First, this radio's throttle curve is adjustable which means that it can be changed to give finer control at the higher speeds. Second, and more importantly, this package comes with an electronic speed control. Compared to the (included) mechanical servo-controlled 3-speed throttle, the electronic speed control gives direct, electronic, infinite throttle adjustment. The Futaba 2PCKA radio package has been replaced by the 2PHKA radio package. The MC210CB is no longer available, and has been replaced by the MC230CR.
Promotional Discount - Enter this number (available on the Tower front page) near the end of the order process and save $25.
Shipping - I beg you... don't make the mistake I did. Spend the extra $2 ($6.50) for Standard UPS Ground. My previous order was shipped with the $4.50 Economy and took more than three weeks to arrive. I found out "Economy" means that the order is given to the USPS who then gives it to a no-name shipper. "If it's not there by the end of next week [a month later], call and we'll send you another one." Weak.
For more information, see the Questions and Answers page.
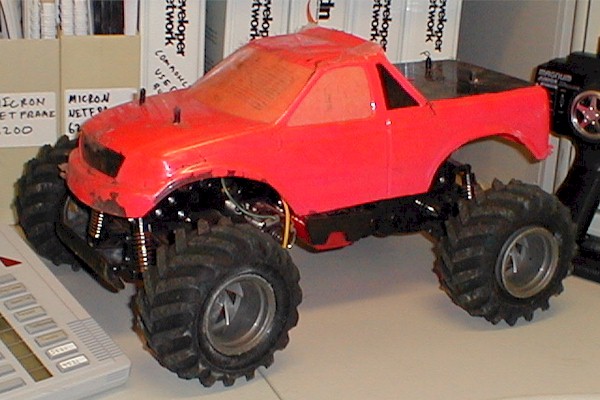
Modifications:
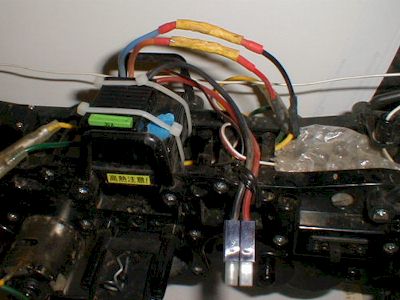 Attaching
the New Speed Control - Use the original pre-made "Y" adapter wires
(attached to the old mechanical speed controller) by soldering them to the new electronic
speed controller. In the image, you can see the red/yellow
shrink tubing. The solder bead is too big for the smaller red tubing, so I used the red as
a spacer, then the bigger yellow shrink tubing to cover the bare wire. Also notice the
blue tape used to keep dust out of the speed controller adjustment holes. I zip-tied the
speed controller in between the two little "roll bars" where the receiver is
supposed to go. The speed controller can get hot, so I wanted it where it would have a lot
of air. I wrapped the receiver in bubble wrap and stuffed in inside the frame in the rear.
Attaching
the New Speed Control - Use the original pre-made "Y" adapter wires
(attached to the old mechanical speed controller) by soldering them to the new electronic
speed controller. In the image, you can see the red/yellow
shrink tubing. The solder bead is too big for the smaller red tubing, so I used the red as
a spacer, then the bigger yellow shrink tubing to cover the bare wire. Also notice the
blue tape used to keep dust out of the speed controller adjustment holes. I zip-tied the
speed controller in between the two little "roll bars" where the receiver is
supposed to go. The speed controller can get hot, so I wanted it where it would have a lot
of air. I wrapped the receiver in bubble wrap and stuffed in inside the frame in the rear.
Glue the Tires - Ignore the instructions... the tires need to be glued to the wheels or you'll have tons of slip. Put four drops of thin cyanoacrylate (super) glue inside each wheel, inboard and outboard (32 drops total). Alternately, glue the entire rim on one or both sides of each wheel.
Stephen C. had a good idea that's working for him. He cut thin strips of old bicycle tire and glued the strips to the rims. That way the tires don't slip against the rubber and the tires can also be replaced easily.
Lock the Rear Differential - Locking the differential prevents wheel spin is one wheel loses traction. For example, if one rear wheel is slipping, the other rear wheel will still continue to provide traction. A few methods have been used so far. Elmer's (white) glue and bits of paper-clip wire have both failed. Stuffing rubber bands into the rear differential has worked so far. Find out more on the Questions and Answers page.
Drive Shaft - Oops, I broke a drive shaft. One of the little pins on the end of the dog bone wore out and broke.