Industry Figure | Berkeley | Back to Jeep Cherokee
Cherokee Front Winch Bumper Installation
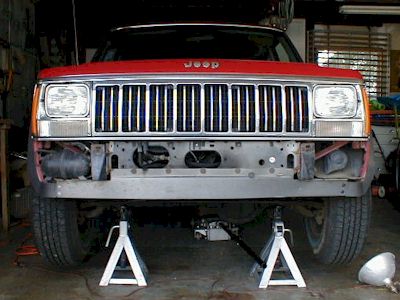
The front winch bumper arrived from Custom 4x4 Fabrication in two boxes. The bumper finish is superb. Literally everyone who has seen it compliments me on its good looks.

During the installation, I called and spoke to Kathy and Mike a few times. I learned that previously included drawings caused confusion and created more questions than they answered. New diagrams are being produced but are not yet available. Nevertheless, the written instructions are especially clear. The original written instructions from Custom 4x4 are reproduced below in italic and are indented. My comments and links to images are inserted throughout. I had a few questions and a couple of trouble spots which I'll discuss. All the images are shown--roughly in installation order--at the bottom of the page.
Installation Instructions for Cherokee Front Winch Bumper
This kit includes the following:
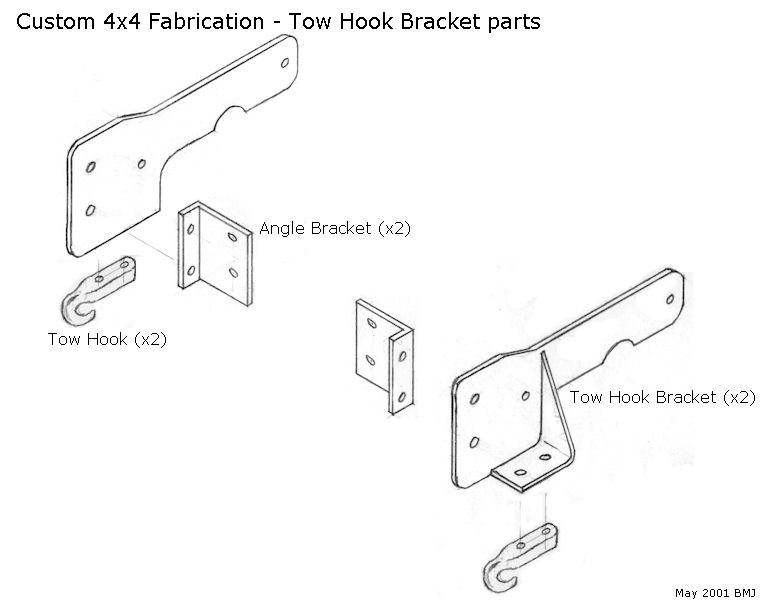
A - 2 Mounting Arms
B - 2 Angle Brackets (use only if your Jeep does not have factory tow hooks)
C - 1 Winch Mount
D - 1 Bumper Face
E - 2 Corner Braces
F - 1 Hardware Kit
It's simple to remove the original front bumper. Before you unbolt the bumper, unbolt the vacuum canister (10 mm socket). The canister is attached to the bumper on the passenger side using two bolts (one of the bolts is shown here on the left). Once the canister is detached, remove the four torx bolts (size T50) holding the bumper in place. There are two bolts under the bumperettes and two bolts hidden behind the bumper accessible from under the car.
You'll find throughout the project that the flexible fiber-board shield under the engine compartment gets in the way. It needs to be unbolted/unpinned and moved to access the two hidden torx bumper bolts.
Remove the bumper brackets from both sides. You'll need to remove three (metric) bolts per side. Remove the silly clip-on bolts, too.
After removing the factory front bumper and brackets follow the steps below:
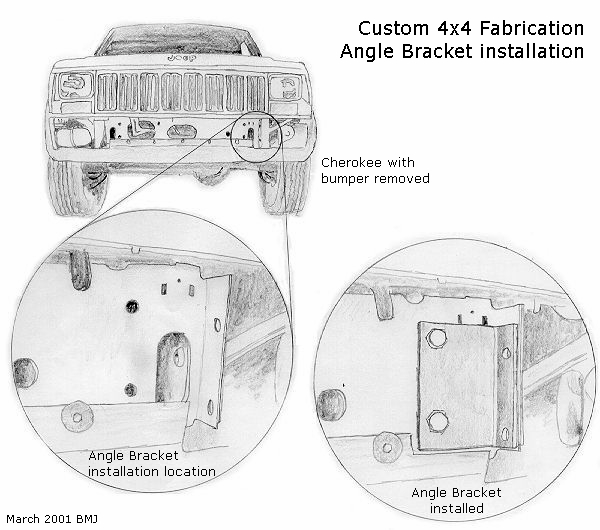
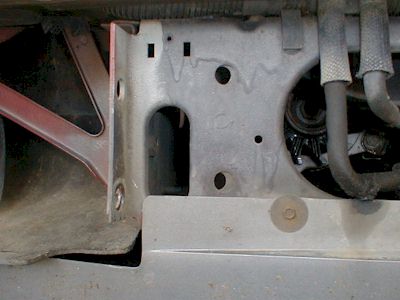
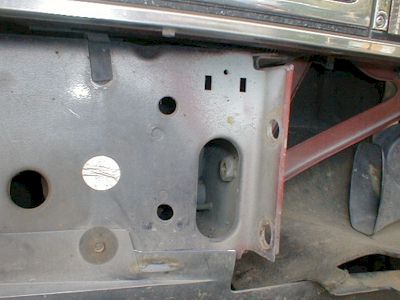
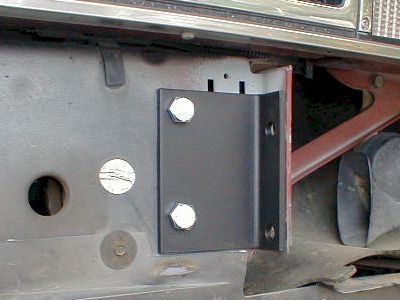
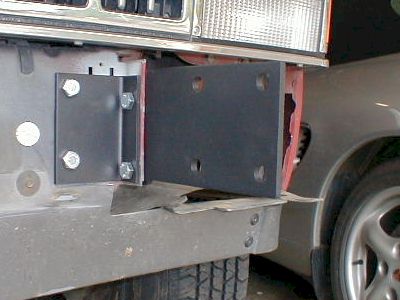
Step 1: Install the 2 Angle Brackets (part B) to the front of the uni-body using two M10 x 1.5 x 30 metric bolts per side. (This step is for Jeeps without factory tow hooks.) Do not tighten bolts!
The M10 metric bolts use a 17 mm socket. The Angle Brackets are attached to the front of the uni-body through two holes (before and after). The brackets distribute forces from the bumper to both sides of the uni-body frame. On my Jeep the holes on the passenger side didn't line up (the bottom hole was the worst). I had to drill/grind the opening so that the bolt would fit through.
Attaching the driver's side bracket is the hardest because the power steering assembly gets in the way. Don't despair. It can be done.
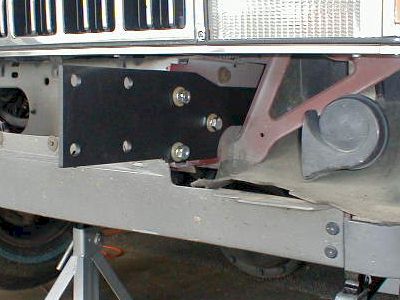
Step 2: Install the 2 Mounting Arms (part A) using the same holes the factory arms used using three M10 x 1.5 x 30 metric bolts per side. Use one 1/2" x 13 x 3 1/2" bolt in the rear hole in the Mounting Arm per side. Do not tighten bolts!
While removing the factory bumper brackets, you noticed that one nut on each side was a real nut welded to the uni-body frame. You also may have noticed that the Hardware Kit comes with two fewer metric nuts than bolts and washers. Before discovering this, I panicked and bought two more metric nuts which I didn't need.
Again, the M10 metric bolts use a 17 mm socket. The 1/2" bolts use a 3/4" socket. Attaching the Mounting Arms with the three metric bolts is easy. The fourth longer, 3 1/2" bolt toward the rear isn't much harder. Again, the flexible fiber-board shield gets in the way.
On the passenger side, the long bolt hit my alternator. (Mike said that the bolt lengths vary and every car is different, so you might not have this problem.) I thought about shimming the bolt head with some of the included flat washers, but it looked like doing so would cause the anti-sway bar to hit the bolt head. I ended up cutting off about 1/4" of the bolt. I first threaded the nut all the way onto the bolt (important). After cutting off the bolt end with a hack saw, I unscrewed the nut which helped straightened the threads. Finally, using a metal file, I cleaned up the sawn threads and reshaped them to look like the pre-cut thread ends.
Step 3: Install the Winch Mount (part C) to the Mounting Arms using eight 1/2" x 13 x 1 1/2" bolts. Do not tighten bolts!
Again, the 1/2" bolts use a 3/4" socket. The Winch Mount is the heavy piece. You'll need one strong back to hold it in place while a second person slips in a couple of bolts on each side.
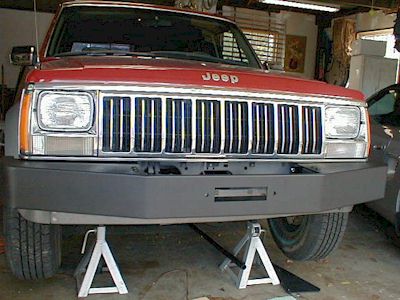
Step 4: Install the Bumper Face (part D) by sliding it over the Winch Mount making sure it rests on top of the factory sheet metal. If you are not installing a Grill Guard, bolt top of Bumper Face to top of Winch Mount using four 1/2" x 13 x 1 1/4" button head socket cap screws. If you are installing a Grill Guard, leave these bolts out for now. Do not tighten bolts!
The socket cap screws require a 5/16" Hex wrench. The 1/2" bolts use a 3/4" socket. I don't know what the instructions mean by "making sure it rests on top of the factory sheet metal." There's only one way to put on the Bumper Face.
Step 5: If you have a roller fairlead, install at this time using two 1/2" x 13 x 1" bolts to attach to Bumper Face and Winch Mounts. If you are not installing a roller fairlead, attach Bumper Face to Winch Mount using two 1/2" x 13 x 1" bolts. Do not tighten bolts!
Again, the 1/2" bolts use a 3/4" socket. I waffled back and forth on where to place the tow hooks. Since no one can agree on hooks vs. shackles or top vs. bottom it came down to aesthetics. I don't have the Grill Guard (yet) and I thought the hooks looked better on the top, so that's where they are.
Step 6: Using a floor jack or a second person, level bumper with vehicle and tighten all bolts.
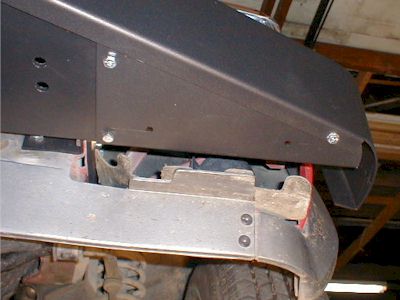
You can see in the all-the-bolts-are-loose image that there's a bigger gap on the passenger side between the top of the new bumper and the chrome strip below the lights/grill. I used a 4x4 (what else?) and the floor jack to adjust the bumper until it was level with the grill. This part was a bit tricky and it took a few tries to get it right. After tightening a few bolts, the bumper would be crooked again. I think that the bolt tightening order is important, so here's how I did it.
There's a lot of slop when all the bolts are loose, so tightening some of them still leaves plenty of adjustment. Tighten the Bumper Face to the Winch Mount using the four black button head hex socket cap bolts (or the tow hooks and bolts like I did) and the two front (fairlead) bolts. Adjust the bumper level with the grill/vehicle. Next, tighten the four (two on each side) bolts which connect the Angle Brackets and the Mounting Arms. Tightening these two at this time makes sure that there is a stress-free bond of these two pieces and the pinch seam between them. Now tighten everything else. I don't think the order matters at this point. Just keep checking on the bumper position to make sure it hasn't shifted.
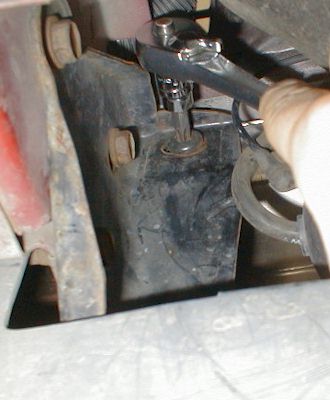
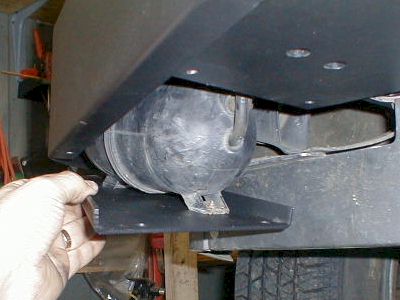
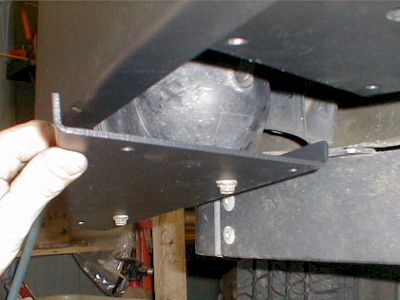
Step 7: Install the two Corner Braces (part E) to the Winch Mount and to the Bumper Face using three 5/16" x 18 x 1" bolts per side.
Re-bolt the vacuum canister to the passenger side Corner Brace using the original screws (10 mm socket).
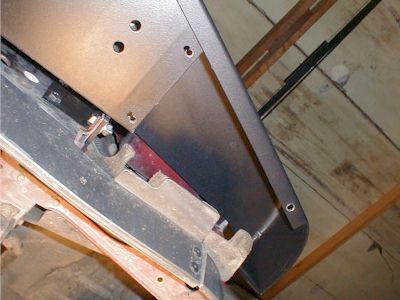
Here's where I ran into the most trouble. Like I said, there aren't any diagrams to go with the instructions. The old ones were bad and the new ones aren't done yet. It seemed obvious to me where the triangular Corner Braces went, but the holes wouldn't line up. After bolting the Bumper Face to the Winch Mount, there was a nice gap between them perfectly sized to fit the Corner Brace. Impressive! But, since the Corner Brace is triangular shaped with little "wings," it will only slide toward the center so far. And "so far" wasn't enough for the bolt holes to line up.
I thought maybe the Corner Brace should go above the flange instead. Now the holes lined up, but there was an obnoxious gap between the Bumper Face lower lip and the Corner Brace. I decided to re-drill the holes in both flanges (sides). I burned up a few bits going through that thick steel, but the result was good.
It was hard to believe such nice work (the Custom 4x4 Fabrication bumper) would be marred by misplace holes. Sure enough, I spoke to Mike a day after finishing the project. It's really hard to explain the situation over the phone, but it sounds like I did it the wrong way.
The last thing to do was to rebolt/repin the flexible fiber-board shield under the engine compartment. I will also bolt all the original bumper parts together so they don't get lost.
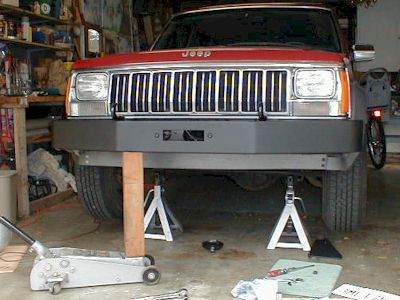
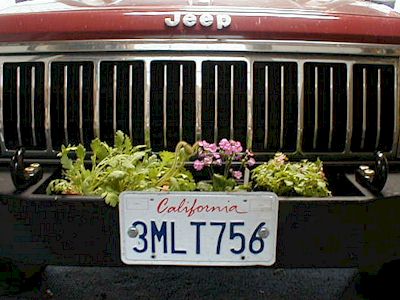
Until I get the winch, I think that a nice redwood planter and some flowers would look great in that spot. What do you think?
Enjoy your new Custom 4x4 Fabrication Front Winch Bumper!!!
Thanks Mike and Kathy. I will!


Installation Diagrams
Here are the installation diagrams for the Front Winch Bumper and the Tow Hook Brackets.