
Cherokee XJ H4 Headlight Replacement
![]()
I always wondered why guys would spend so much money on fancy replacement headlights. My long trip through the night to Moab convinced me they knew something I didn't.
Research
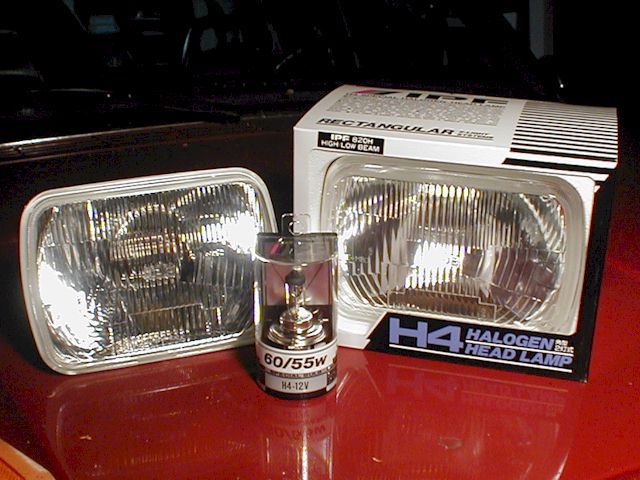
Both Hella and IPF make excellent H4 headlamp replacement systems. While speaking to the folks at Rocky Road Outfitters about a suspension issue, I found their great deal on IPF H4 headlight inserts and 55/60W bulbs and ordered a set. This headlamp system -- a high-quality lenses and replaceable blulbs -- is a direct replacement for the stock headlamps, either rectangular or round.
Replacement H4 bulbs are also available in 80/110 and 90/145 wattages, but these higher-power bulbs require a wiring harness replacement to handle the extra power. Also, the higher wattage bulbs are not legal for street use. I'm not even sure (don't tell me) if the 55/60W bulbs are legal.
Installation
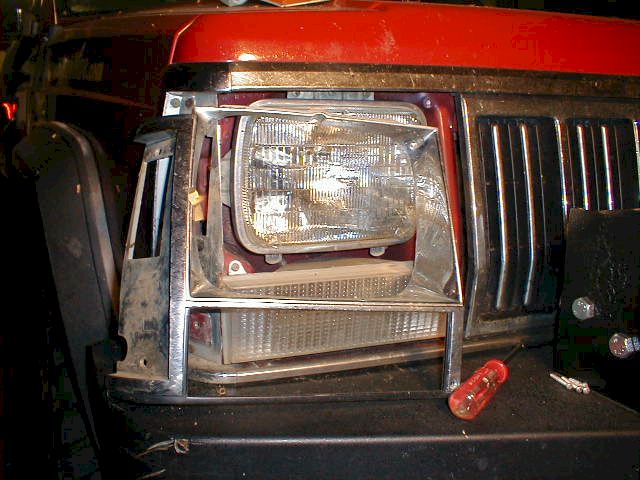
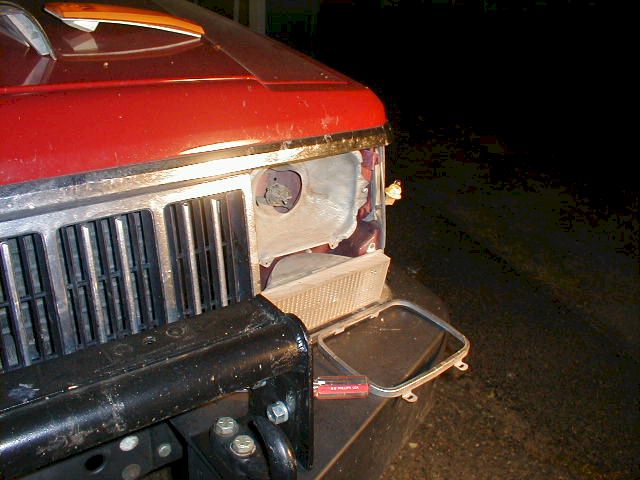
Replacing the lenses was simple. It took me less than an hour total, including taking all the pictures and uploading them to the web. These lenses replace the standard rectangular or round lights, not the new shaped lenses found on many newer vehicles (like the WJ). So, if you've got standard lights, no matter what you're driving, headlamp replacement is easy. For the Cherokee, all you need is a Phillips screwdriver.
On the Cherokee, remove the two screws holding the amber side-marker and untwist the yellow rubber lamp holder. Set aside the amber side-marker. Remove the two screws holding the chrome headlight bezel in place. Set aside the bezel. Remove the four screws holding the retaining ring in place. The headlamp is free once the ring is removed, so don't let it fall. Unplug the old lamp.
Reassembly is, predictably, the reverse of disassembly. The only trick is putting the H4 bulb into the H4 lamp/lens without damaging the bulb. It's very important to not touch the bulb. The tiny bit of oil and dirt transferred by your fingers will cause a hot spot and lead to premature failure of the bulb. It's not brain surgery, though. Just be careful.

Adjustment
The lenses come with adjustment instructions. Adjustment involves measuring and marking the headlamp centers on a vertical wall at a given distance. I had no convienent access to a level surface and wall, so I approximated the adjustment assuming I would get a chance soon to drive at night and adjust the beams. This was a mistake and I don't recommend waiting "until later" to make the critical adjustments.
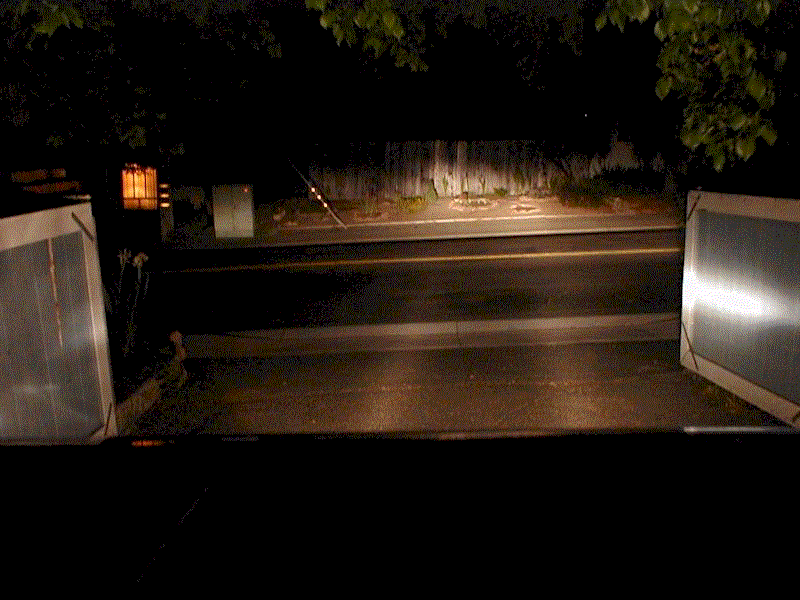
Unlike the standard beams, which cast poor, scattered light, the IPF beams are extremely sharp. The unforseen consequence of this is that if the beams are aimed too low, you literaly cannot see anything beyond the light pattern. There is simply no scattered light from the lens to spill past the pattern. Conversely, if your initial adjustment is too high, you will blind any driver in front of you. Also, don't assume your new H4 beams will be correct if your current headlamps are correct.
I was fortunate that my first nighttime drive was on a lonely road, heading home from an event with the SLO 4-Wheelers. I was driving on a curvy road and, even though my beams were just a little too low, it seemed like I was driving blind, especially when approaching a hill or dipping down into a gully. After about four or five adjustment stops, I had the beams adjusted correctly. (It helps to have another person to block the light from one beam while you are adjusting the other.)
Performance
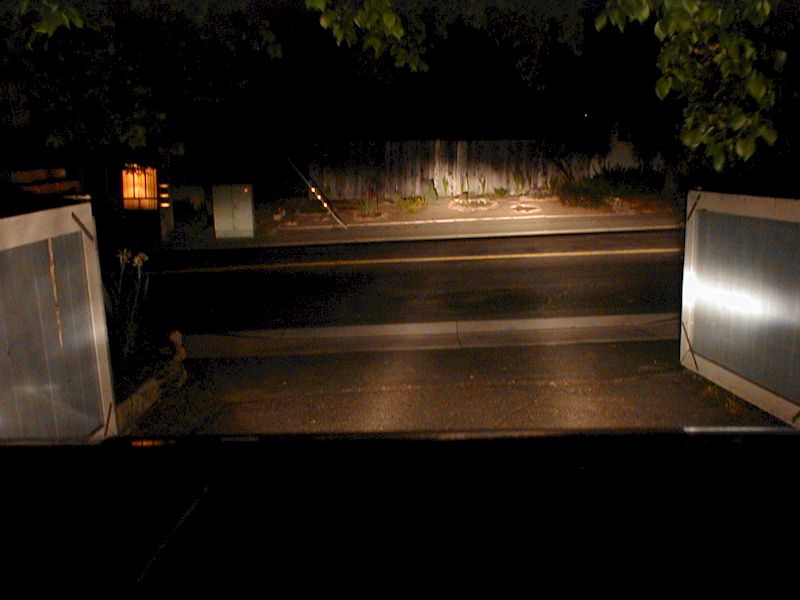
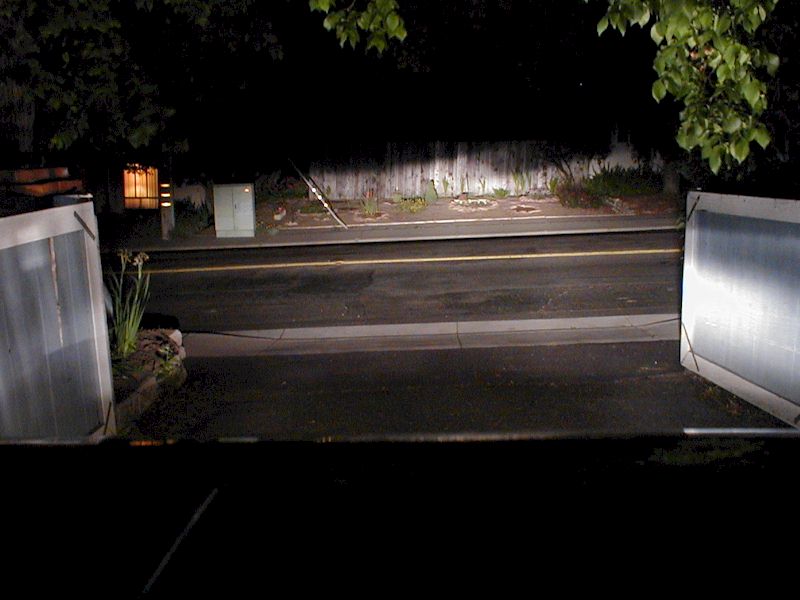
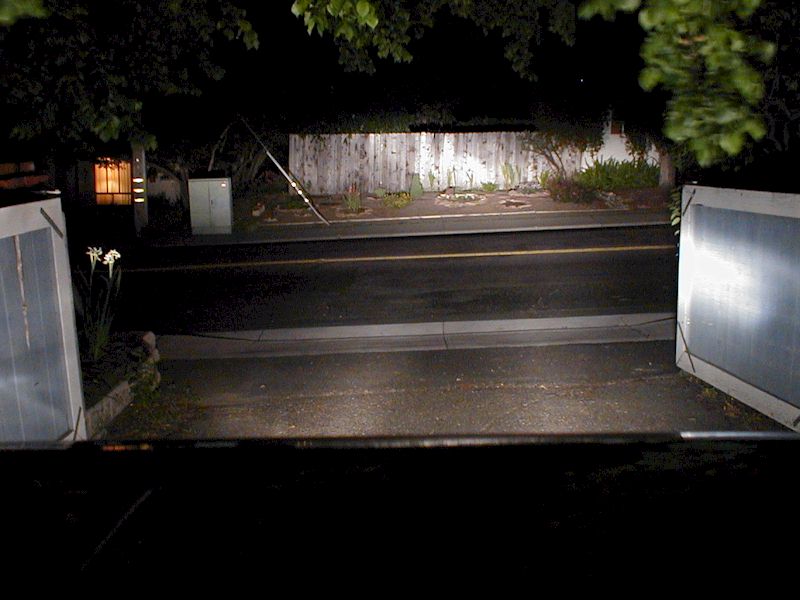
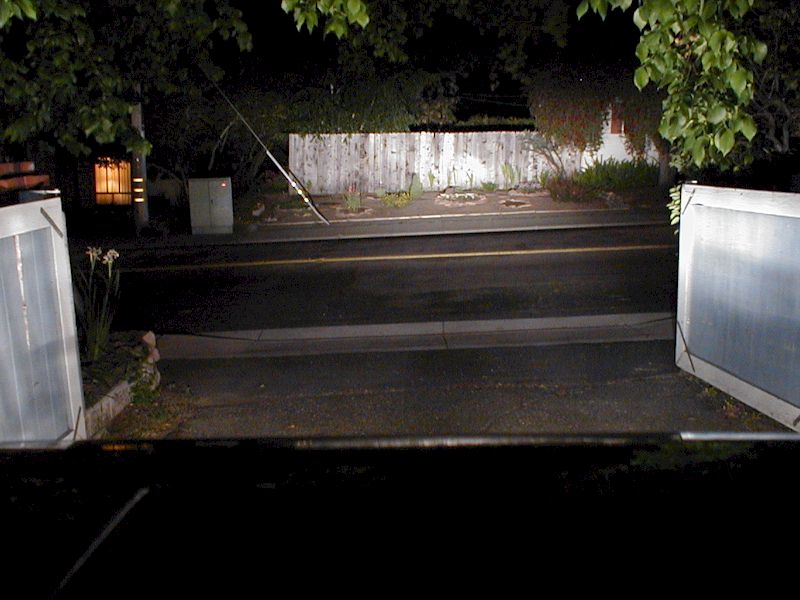
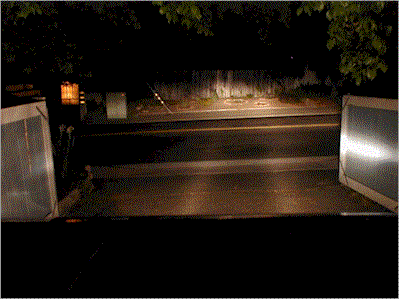
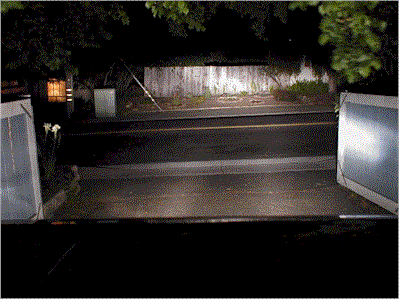
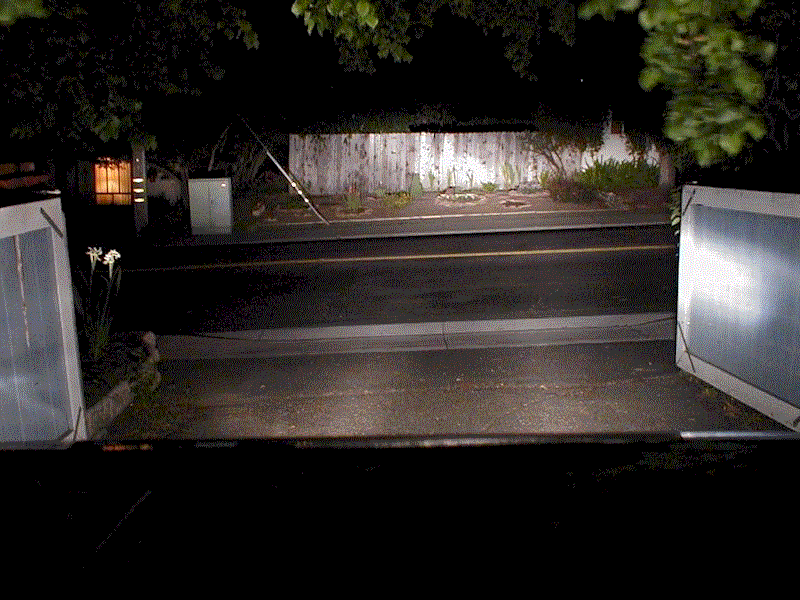
The images comparing the light output of the old lights to the new IPF H4 lenses are not as scientific as I would like. I took them with my digital camera which has no settings for aperture or speed. Nevertheless, the low beam images are very much like they looked to the naked eye; the light cast by the original low beams was yellow and uneven. The low beam comparison shows the dramatic difference. The high beams? Even though you can see a difference between the original lights and new IPF H4 high beams, I suspect that the lack of camera controls diminished the positive gain seen. The light output of the H4s seemed much greater, but the camera probably said to itself, "Well, that's enough light... time to close the lens."
  |
  |
Here's the old and new low beams. |
Here's the old and new high beams. |
I haven't driven much at night yet with the new H4 lenses, but I'm looking forward to doing so and submitting a long-term report. Until then, it's clear that the expense of these lenses is worth the price. The lenses are, as expected, high quality, the tempered glass (3/8" thick) is tough, and the beam pattern is bright and sharp.
IPF, H4 Halogen Head Lamp, Rectangular 2-Light Systems, IPF 820H, High/Low Beam
IPF, Special Halogen Bulb, 60/55W, H4-12V